Wednesday 31 December 2014

The 52 Week Savings Plan.

 How to save some money every week for one year.


Take a nice big jar or tin and add a label so you don't forget and dip into it.
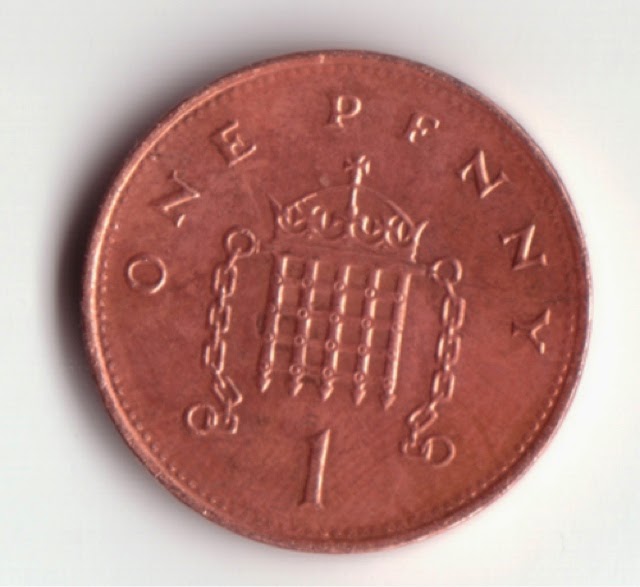
Week 1 put in £1
Week 2 put in £2 Total now up to £3
Week 3 put in £3 Total now up to £6
Week 4 put in £4 Total now up to £10
Week 5 put in £5 Total now up to £15
Week 6 put in £6 Total now up to £21
Week 7 put in £7 Total now up to £28
Week  8 put in £8 Total now up to £36
Week  9 put in £9 Total now up to £45
Week 10 put in £10 Total now up to £55
Week 11 put in £11 Total now up to £66
Week 12 put in £12 Total now up to £78 After 3 Months

Week 13 put in £13 Total now up to £91
Week 14 put in £14 Total now up to £105
Week 15 put in £15 Total now up to £120
Week 16 put in £16 Total now up to £136
Week 17 put in £17 Total now up to £153
Week 18 put in £18 Total now up to £171
Week 19 put in £19 Total now up to £190
Week 20 put in £20 Total now up to £210
Week 21 put in £21 Total now up to £231
Week 22 put in £22 Total now up to £253
Week 23 put in £23 Total now up to £276
Week 24 put in £24 Total now up to £300
Week 25 put in £25 Total now up to £325
Week 26 put in £26 Total now up to £351 After 6 Months

Week 27 put in £27 Total now up to £378
Week 28 put in £28 Total now up to £406
Week 29 put in £29 Total now up to £435
Week 30 put in £30 Total now up to £465
Week 31 put in £31 Total now up to £496
Week 32 put in £32 Total now up to £528
Week 33 put in £33 Total now up to £561
Week 34 put in £34 Total now up to £595
Week 35 put in £35 Total now up to £630
Week 36 put in £36 Total now up to £666
Week 37 put in £37 Total now up to £703
Week 38 put in £38 Total now up to £741 After 9 Months

Week 39 put in £39 Total now up to £780
Week 40 put in £40 Total now up to £820
Week 41 put in £41 Total now up to £861
Week 42 put in £42 Total now up to £903
Week 43 put in £43 Total now up to £946
Week 44 put in £44 Total now up to £990
Week 45 put in £45 Total now up to £1035
Week 46 put in £46 Total now up to £1081
Week 47 put in £47 Total now up to £1128
Week 48 put in £48 Total now up to £1176
Week 49 put in £49 Total now up to £1225
Week 50 put in £50 Total now up to £1275
Week 51 put in £51 Total now up to £1326
Week 52 put in £52 Total now up to £1378 After 12 Months

Total Savings Now = £1378

Keeping Things Neat in the Kitchen.

Don't know how I've never thought of this before....
Attaching velcro to the back of an appliance and the other part of the velco to the back of the corresponding plug is such a nifty way to keep things neat in the kitchen.

How To Keep Scissors Sharp

A good tip for keeping scissors sharp... Cutting through some sandpaper.
 The amount of pesky scissors we've replaced for going blunt!

How to stop a pan over-boiling.

Pretty neat trick that actually works! It has to be a wooden spoon, in practice metal and plastic ones don't work. 

Organising the Kids in the Car.

Does the back of your car resemble something like this.....?
 

Well not anymore.... All you need is a sofa tidy (ikea do one in cream or black for approx £4 (flört) and here you go....instant organiser! Perfect as it can be removable.

Add me on 📌 Pinterest @mrsnslawit
If you instagram mrsnslawit


Remembering to do your 'To Do List'.

  Do you ever think I must do that and forget? Do you ever make well meaning lists but then leave them on the kitchen table or chuck them in the bottom of your bag?
  Well not anymore! All you need is some sticky notes or some little coloured bits of paper and sellotape.
  Attach to your bag and then once the task is completed tear of and discard! Organised perfection.

Follow me on Pinterest 📌 @mrsnslawit 
If you instagram mrsnslawit

Organising After Christmas

Hi all,
It's been a while but I'm back again with plenty of organising ideas!

  Here's a great way of organising all those little bits and pieces that you come across whilst tidying up but can't remeber what they belong to or where they go. 
Just pop them in a container or bucket labelled 'missing parts' and when you or the kiddies come across something that's missing a part, this will be there to check in before replacing the missing piece. 

Happy New Year! 


Friday 11 July 2014

Shower Cap Storage

Whether you are going on holiday, a business trip or just need a clever way to store those less than pristine shoes....
Here it is....
                                   

Pop your shoes in a shower cap and throw them in your suitcase or in the cupboard! 
Et Volià! 
Clean, neat and shoes are kept together as a pair!

It doesn't matter if your shoes aren't dirty this is a great way to keep a pair together!

Pretty Bathroom Organising

  The bathroom is one of those rooms where you either really care what it looks like or you aren't to bothered as long as its clean. Either way, storing bathroom products in glass jars is practical and pretty. Items being stored in see through jars, easily allows you to see what you have and what you are running out of. 

  If you've ever been a guest in someone else's house you will also appreciate being able to easily find the soap or shampoo! Having them out on dispaly as decorative and practical, kills two brids with one stone! 
  For those of us who think having a beautiful bathroom is a must, this is an instant way to add some 'boutique chic'. Putting unwrapped bars of matching soaps in a jar, cotton buds in another and cotton wool in another instantly adds style and class. Yet it's such a simple idea! 
  Even items such as mouthwash can be pored into glass bottles or whisky decanters for a lovely way to tie in the whole look! 
 
Tip: Don't put any cleaning products or medicines in unlabelled jars! 

Built in pan stirrer holder!

This is just a really simple, yet a really obvious idea that I came across but never realised before.
  I was about to purchase a spoon rest, as I always end up with sauce on the hob or counter. But then I saw a picture like this and thought duh! This is so obvious yet so clever! Practical, useful and free!


Jar of Ideas?

  We all have hopes, dreams and ideas. But how many of us actaully write them down?!

   I bet most of you are reading this and are thinking I keep meaning to. 
  Our ideas come to us at all different times of the day or night. You should always have a notepad and a pen within arms reach, and when something you think of that you would like to do, or something you would like to find out or something you want for the future you should jot it down and put it in a little jar. Then you will have all of your lovely ideas in one place.

  I find this especially useful just before bed, if i have things on my mind i tend to write down a list of what I'm thinking then I can easily drift off to sleep.
  On a rainy or boring day when you've not much to do, you should empty the jar out on the kitchen table and have a look through, you never know when might be the right day to start a project or to do what you want. It could have been the idea or dream that you've been needing. 
  When I'm feeling a little low this is always an instant pick me up. (Also looks pretty on a desk or sideboard!)


Wednesday 2 July 2014

Penny Date Night


Can't decide what to do for date night?

Try this simple idea...

1. Get dressed to go out.
2. Take out a coin.
3. Let your partner pick a number between 10-20. (This will be the number of times you flip the coin.)
4. Pull out of the driveway and begin.
5. Flip the coin heads its right, tails its left.
6. Every time you come to a turning, flip the penny and take the corresponding direction.
7. Once you get to the number chosen, STOP and look around, make a date where you are.

You can use this when deciding what to do for a family day out too! 

Monday 23 June 2014

Bedding Organising


This is such an obvious idea; I am surprised that we haven’t all thought of this before!

  Fold your sheets, other pillowcases and duvet covers and place inside one pillowcase! Then stack in a cupboard or place in a drawer. It is neat and keeps a set together. No more unnecessary rummaging, looking for matching bedding ever again!

  Tip: My Granny always used to say; you need one set of bedding on the bed, one in the wash and one in the cupboard. I stick to this but have added my own little touch by also keeping a spare!


Wednesday 18 June 2014

Chore Magnets


Here’s one for all the family and yes I mean mum and dad too!

  This is something you could easily make yourself too. All you need is a little craft glue, some magnets or magnetic strip and something to write on that’s sturdy. You could use card if you wanted (card would be best laminated) or some small wooden disks for sturdiness.


Items Needed
Craft glue
Magnets
Card or wooden disks
Sharpie or marker pen
Pen & a piece of paper
Time needed: 20 minutes (not including drying time – depends on size of each magnet)

  Take each individual magnet that you are going to write on (before attaching the actual magnet part) and write each individual chore and how much the person would earn for doing each chore in marker.

Tip: Take out a pen and paper first and jot down a list of chores and how much each is worth. Save you wasting your magnets if you want to change your ideas/ amounts.

  Once you are happy with your designs, take out the craft glue and magnet part and glue on with the write side facing down.

Tip: Make sure the marker is dry before turning over you don’t want it to smudge!

  Leave your magnet to dry, your craft glue should become clear in most parts when it’s properly dry.
  Then stick them on the fridge or magnetic board! And get your family involved!

  When I said it is for the mums and dads too I ment it. Is there a new pair of shoes mum wants? Or perhaps some Kindle books?? Does dad want a new golf club or a new phone case?? Set up a jar for each person in the household’s chore earnings.

A great way to get the kids to learn that you have to work for your money.
In addition, a great way to get everyone involved in organising and tidying the house! Winner all round.

Tip: If there are certain chores that would need adult supervision such as using cleaning products put this on the wording on the magnet.

List of ideas for chore magnets:

Make bed £0.15
Hoover bedroom £0.20
Put away clean laundry £0.25
Empty kitchen bin £0.45
Empty bathroom bin £0.35
Clean kitchen window £0.10
Hoover living-room £0.20
Brush the dog £0.10
Unload dishwasher £0.25
Load dishwasher £0.30
Remove hair from shower £0.10
Clean toilet £0.40
Clean entrance floor £0.15                               The list could go on forever!

Organising Photographs


  In this day and age we are all a little too snap happy, oh of course it’s not a bad thing but it does make organising and storing them a little trickier.

  With all this photographing and not enough wall space to put images of seven different angles of your daughter picking a flower or eleven different views of your son blowing out his birthday candles, a clever storage solution id in desperate need.

  There are a couple of ways to get your pictures organised, it depends what suits you best.

  You can go old fashioned like me, I like to get mine printed and put them in hard back books. Organising them by date and by year per book. They do look quite cool on a bookshelf and can be a real talking point at parties or get-togethers, also this means that they are there on hand went you want to get a bit nostalgic.

  You can get some USB sticks and load your photos on to them so they are saved/ backed up but would need to be plugged into a computer to be viewed.

  You can also load your photos onto some discs to file neatly on your bookshelves but again you would need to load your discs on a computer to view the photos.

  Another idea is a memory chip that could be loaded onto a digital photo frame that plays the images on a slide show. You would need to plug in the leccy but these can be a nice feature on a sideboard or desk.

 Whatever you decide to do with your photographs, make sure you save them somewhere other than on your phone or your camera because if you lose or damage it then you could potentially lose all your pictures.

Fed up of losing your charger?


  Everything we have these days seems to have a charger of some sort doesn’t it? And with so many cables and wires and similar looking chargers we could all do with some sort of system to easily find the one we want.

  So here it is a perfect solution…

  Take a pretty glass jar and some sticky labels. Cut the sticky labels to a size to fit and write on the label what the charger is for. You can jazz up the sticky labels with little boarders in different coloured pens. I like to use different coloured sharpies but any felt tip pen would do the trick.

  Taking organising a step further, you can post a wrapped up charger into a cardboard roll and label that too! This would help to keep the wires neat.

Monday 16 June 2014

Hidden Storage


If you’re anything like me and have lots of things in your home that you wouldn’t pick to have there but need them to actually function or if you are just looking for clever ways to store items you would rather hide, then these clever ideas could help you get around that.

 
1.                  The Remote Controls – Carve out an old books interior and put it on the coffee table. To visiting guests it’s just a book on the coffee table, to you and me it’s a hidden remote control!

Tip: Don’t forget to tell the baby sitter where you keep the remote!


2.                Tissues – Carve out an old book and put a stack of tissues inside. Don’t forget to carve a slit for extracting the tissues out one by one!

Tip: If you get a big enough old book you won’t even need to take your tissues out of the box they came in.


3.                Can Safe – you can buy these from most general stores and quirky little nicnak shops. However, if you would prefer to make your own carefully remove the bottom or top of your can/tin. Empty the content s into another storage container and thoroughly wash the can out carefully. Then use sandpaper to smooth the edges and there you go an instant safe for keys/cash and small valuables etc. (You can reattach the lid or bottom with a piece of masking tape hidden on the inside of the item.)

Now you can stand the can back in your cupboard and there you have it a clever disguised safe store!

Tip: Use an item that is quiet common like a can of beans as it is less likely to stand out!


4.                Storage – Take a shoebox and some old books, carefully cut off the spines of the books to use. Stick the spines along one of the long edges of the shoebox, PVA /craft glue is good for this. Make sure you have enough book spines to cover the length of one side of the shoebox. Just pop it on your bookshelves in-between the rest of your books... Et Voilà!

Tip: Hardback books are the best for this project!


5.                 Lawn sprinkler key hide - We have all had that Oh-No moment when we have locked ourselves out of the house or forgot our keys, well never fear with this nifty idea this will never happen to you again. No burglar will think to check inside a piece of plastic lawn equipment. Cheap to pick up from any good D.I.Y store or garden centre.
Tip: You probably have something like this lurking around in the shed so go check there first!


6.                Hidden TV – If you are anything like me then you love having all the mod cons around as they certainly make life easier and more enjoyable but they aren’t always pretty to look at not with your New England décor anyway! Here is a clever solution, a couple of cupboard doors or cleverly made MDF pieces (if you’re like me and always on the hunt for a bargain!) and some metal runners. Easy to put up and look fabulous!


7.                 Storage bench – useful for in the garden and in the home! We have one in our bathroom that has a deep storage part that I have painted up and is in our bathroom as a laundry bin.

Tip: If you want to use one in a bathroom or outside a good durable paint is best check the tin before application.


8.                Hidden Bin – Utilise a kitchen cupboard as an area to have a smaller bin or perhaps two, one for recycling. This would prompt you to empty it more often and isn’t there as an eye sore in your kitchen! Many new kitchens have the option to have these built in. However, if you want to simply add one to your existing kitchen like us then take the door off its hinges and attach it to a drawer on runners like above!

Tip: Using a set of smaller bins aids recycling and avoids more sorting later!


9.                Hidden Keys – Bulky keys can be a real eyesore. Putting a picture frame on hinges is a great solution for hiding them not to mention the added bonus of security!


10.            Hidden kitchen roll – We always end up with rolls and rolls of half-used kitchen paper and ones that always get stood in water and stuff. So this is a perfect idea, a shelf and storage all rolled into one!


11.              Hidden litter box –   We have installed a cupboard under the sink in the utility room, with a cat flap so our pet can use easily when we are not there. I have even gone the extra mile to tile the inside and have installed the litter box into a sunken frame, which too is tiled for ease of cleaning. The front of the cupboard has hinged doors so we can get into it to clean and remove any nasties. We have also put a hook inside the cupboard for the scoop and bags as it seemed the obvious place to store it.
 

A blog post on Purrrfect Pet Solution:

Purrrfect Pet Solution


In our house, we have a cute kitty and we love having her around especially when both the cat and the dog sit aside one another on our big fluffy rug fireside, on those cold winter evenings when we are all toasting ourselves by the fire there’s nothing that completes our home more. However, one drawback to having a purring pussycat by your side is when kitty has to go to the bathroom.

 We’ve had our cat about 18 months, we rescued her and are glad we did but my other half is just about at his wits end with cleaning up after it and tripping over the litter tray. So after a one too many rows over what to do I turned to Pinterest and came across these fabulous ideas…


   We have installed a cupboard under the sink in the utility room, with a cat flap so our pet can use easily when we are not there. I have even gone the extra mile to tile the inside and have installed the litter box into a sunken frame, which too is tiled for ease of cleaning. The front of the cupboard has hinged doors so we can get into it to clean and remove any nasty’s. We have also put a hook inside the cupboard for the scoop and bags as it seemed the obvious place to store it.

Items needed:
Plastic litter tray
Cat litter / shredded newspaper/ sawdust
Scoop
Hook
Cupboard (ideally with hinged doors) / Wooden storage box
Cat flap
Air vent (optional)
Saw
Sandpaper
Hinges
Screws
Screwdriver

If tiling:
Tiles
Tile Adhesive
Grout
Tile spacers

Time needed: 30 mins / 1 hour.

Tip: Pop a car hanging air freshener on a hook in there too!

Shopping List

Shopping List - Free Printable


Dairy
Produce
ð       
ð       
ð       
ð       
ð       
ð       
ð       
ð       
ð       
ð       
ð       
ð       
ð       
ð       
ð       
ð       
ð       
ð       
ð       
ð       
ð       
ð       
ð       
ð       
ð       
ð       
ð       
Other
ð       
ð       
ð       
ð       
ð       
ð       
Meats
ð       
ð       
ð       
ð       
ð       
ð       
Household
ð       
ð       
ð       
ð       
ð       
ð       
ð       
ð       
ð       
ð       
ð       
ð       
ð       
ð       
ð       
ð       
ð       
ð       
ð       
ð       
ð       
ð       
ð       
ð       
ð       
Frozen
ð       
ð       
ð       
ð       
ð       
ð       
ð       
ð       
ð       
ð       
ð       
ð       
ð       
ð       
ð       
ð       
ð       
ð       
ð       
ð       
ð       
Personal
ð       
ð       
ð       
ð       
ð       
ð       
ð       
ð       
ð       
Budget £ ___ .  ___